Welcome to our new Azure Done Right series of blogs. During these blogs we’ll try and share some of our tips and tricks that we’ve built over time that focus on helping managing, operating and securing your Azure environments.
Introduction
In today’s blog, we’re going to show the creation of a very simple automation flow using tools that most IT pros already have at their fingertips and requires very little scripting knowledge. Once we have the basics we can then start building on top of this to add more advanced capabilities (e.g. creating Azure Budgets, defining expiry periods for automated lifecycle management, etc.).
The scenario we’re going to start off with is the automated fulfilment of the request for a new Azure Resource Group. This scenario is very common in environments where IT Pros/Developers operate in a ‘Managed’ Azure environment and do not have access to deploy Azure resources until they are granted at least ‘contributor’ level access to a Resource Group that has been created on their behalf, such as central IT.
So to get started, let’s define some basic requirements, assumptions and good practices:
- Microsoft Forms will be used as the mechanism in which Developers/IT Pros can provide details of their needs
- The requestor will provide the following bits of information, which will be used to create and tag the resource group:
- OwnerEmail
- Purpose (Short)
- Purpose (Long)
- Environment
- The resource group will be creating using a naming standard in the following format: {purpose-short}-{env}-rg
- For simplicity, all resource groups will be created in Australia SouthEast, though this can easily be made an option that can be defined
- An email will be sent to the requestor upon successful completion of the request
Creating the Request Form
Microsoft Forms comes as part of the Microsoft 365 cloud suite, and provides a super fast way to create an easy to use UI that can act as your way of collecting the parameters required to create the Resource Group. Follow this article if you’ve never created one before, but the general idea is you use each question as a way of collecting each of the bits of information we defined as being required above. For example:

Pro Tip: Within the Forms settings, it’s a good idea to enable the Only People in my Organisation can respond and Records Name options. This essentially forces users to perform an AAD Auth to complete the form, which then ultimately gives me the ability to automatically collect the requestor’s email address without having to ask for it in the form.

Creating the Azure App Service Principal
Before we proceed to creating the Azure Logic App, we’re going to first create an Azure App Service Principal as the ‘automation credential’ we’ll be using to perform our tasks. While Logic Apps allows you to use their own credentials for its connections into Azure, using a generic Service Principal is much better practice.
There’s many ways to achieve this, but given the context of our blog, we’ll use the tried and true ClickOps model:
- Within portal.azure.com, navigate to the Azure Active Directory pane and select App Registrations to create a New App Registation
- For the Name use something descriptive like “Azure Logic Apps Automation Service Principal”
- For the account type, use the default: Accounts in this organizational directory only ([TenantName] only – Single tenant)
- A RedirectURI is not required

Once created, navigate to the Certificates & Secrets pane and create a New Client Secret
Provide a Description (it doesn’t really matter what it is) and define an expiry period – 1 Year is a good starting point.

Once you click Add you will be shown the Client Secret (obfuscated in red below). Note this down (securely)! You won’t be able to retrieve it later and you’ll be granting this service principal significant access into your Azure Subscription, so protect this as you would any highly privileged secret.

Back in the Overview pane, note the Client ID (obfuscated in red below) and Directory ID (obfuscated in green below). These in combination with your Client Secret provide you with all the details needed to use your Service Principal in Logic Apps.

Back in the Azure Portal, navigate to the Subscriptions pane, select Access Control (IAM) and select to Add a Role Assignment. Set the role as Owner (so it can create and delegate permissions) and assign it to the Service Principal just created.

Creating your Logic App
Assuming you have an existing Resource Group you can use (e.g. a “IT Management” resource group for hosting IT Ops related resources), create a new Azure Logic App resource.

In the Logic App Designer, Microsoft provides lots of helpful pre-canned templates that you can use, so its a great way to get started on other automation flows you can achieve. For this blog, we’ll start from a Blank Template.
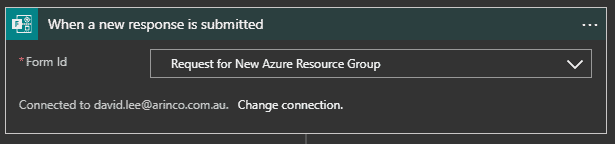
As our trigger, search for Microsoft Forms and use the option When a response is submitted. If this is your first time setting up Logic Apps, you will be prompted to provide some credentials to create a connection to access Microsoft Forms. Once done, you will be able to see the Form created earlier.
Pro Tip: It’s often a good idea to actually create the Microsoft Form in a O365 Group (so it is inherently shared and owner by multiple users). When doing this, you won’t see the Form in the drop down box. Instead you have to select Custom Value for the Form ID. The Form ID is provided in the URL that is generated when you share the Form for users to fill out. For example:
![]()
Now, add an action, select Microsoft Forms from the recent section and select Get Response Details so that it can enumerate and extract the data.

For the Response Id, in the Dynamic Content pane, select the See More option under the When a new response is submitted item to get the List of Response Notifications entry.

For the next action, search for and select Create a Resource Group.

When prompted to create a connection to the Azure Resource Manager service, instead of signing in we’ll connect using a Service Principal and provide the Client ID, Client Secret, Tenant ID from earlier.

Within the Create a Resource Group action, we can now enumerate the Subscription using the drop down box because we granted access to the Service Principal earlier. For the Location we can simply select a specific region. In future scenarios, we can instead define a custom value and calculate a value using an expression or dynamic content (e.g. using a form response).

For the Resource Group Name we’re going to use a combination of Dynamic Content and Expression to calculate the value to put in here. The idea is we’ll concatenate a set of strings to create the resource group name aligned to our naming standards. To do this, use the following steps:
- Select Expression and the Concat() function
- Select Dynamic Content and under Get Response Details, select Purpose (Short)
- Modify the formula (fx) field and add the text ,’-‘, to the end before the closing parentheses
- Select Dynamic Content and select Environment
- Modify the formula field and add the text ,’-rg’ to the end before the closing pararentheses
The net result is something like:
concat(body(‘Get_response_details’)?[‘somestring‘],’-‘,body(‘Get_response_details’)?[‘somestring‘],’-rg’)
which will result in the resource group name being {Purpose}-{Env}-rg
Lastly, select Add New Parameter and select the Tags checkbox. This gives us the option to define the tags that should be applied the the Resource Group as part of creation. This last field requires us to define the tags in JSON format. Which is basically:
{
“tagName1” : “tagValue1”,
“tagName2” : “tagValue2”
}
Again, we can use Dynamic Content to pull responses from the Form submission to populate our Tag Values:

End Result
And there you have it – a super simple Logic App that uses Microsoft Forms as both a trigger and way to input the set of parameters needed to automatically create an Azure Resource Group.

In future blog posts we’ll show how to add more advanced steps into this flow such as Approval workflows, Azure Budget creations, additional validation steps for variables.
More Info
If you or your organisation wish to find out more about how Arinco can help you with our Azure Done Right approach to designing, implementing and managing Azure Environments, go to this link or reach out to us via our website.