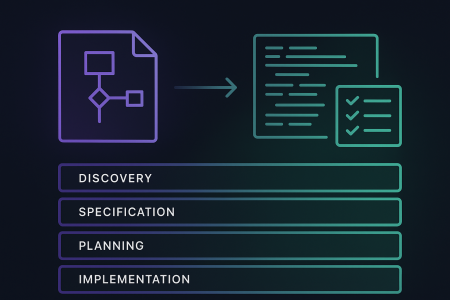
This is the first in a four-part series of posts on securing serverless applications in Azure using bicep. In this series, we take a look at how you can secure serverless Function Apps in Azure. We start with a sample Azure Function App, deploy it to Azure and then progressively enable each of these security features, validating along the way that our changes have been successful and our app is secure. We configure (nearly) all of this using Azure Bicep and the AZ CLI. If you’d like to skip to code it’s all available on GitHub here
Knowledge of the AZ CLI is assumed in this post. If you are new to AZ CLI please see getting started with az cli. All of the commands in this blog post are expected to be run using PowerShell.
Before we go ahead and configure Azure AD authentication we need a Function App to do this. Follow the setup steps below to deploy a sample Function App to Azure.
Setup
We are going to start with a sample Azure Function that queries the Microsoft AdventureWorks demonstration database. It will query the database for the top 5 products, serialise them as JSON and return the result. The Function App code can be viewed here.
We will start with a pre-configured main.bicep file, which you can download here. This file contains the bicep configuration to deploy the following resource:
- Function App
- Storage Account
- Application Insights
- Azure SQL server
- Azure SQL database
The Function App code is deployed to the Function App using a source control reference to the GitHub repo containing the code. The deployment of the code can take a little while and you can view the progress in the Deployment Centre pane of the Function App.
Before we deploy the Azure resource we need to create a resource group.
az group create --name secure-rg --location australiaeast
Now we can deploy the resources in our bicep file by running the following command.
az deployment group create --resource-group secure-rg --template-file main.bicep --query properties.outputs
This initial deployment may take some time as it builds and deploys a Function App project to the Azure Function. The command will output the name of the Function App and a URL that can be used to test the Function to ensure everything was configured correctly.
Tip 1 – Enable Azure AD authentication
One of the first things you can do to secure the Function App is to enable Azure AD authentication. Once Azure AD authentication is enabled, all requests to a Function App will need to provide a valid Azure AD bearer token. Any requests without a valid token will be denied access.
Some of the benefits of enabling Azure AD authentication are:
- Can be enabled through configuration without having to implement it yourself.
- Not dependent on a specific language, SDK or code.
- Authorization behaviour can be customised per your requirements.
First thing we need to do is create an app registration by executing the commands below. These commands will do the following: create the app registration, update its App ID and generate a password credential. You’ll need to replace the {functionAppName} with the functionAppName output from the initial deployment.
$functionAppName="{functionAppName}"
$appId=$(az ad app create --display-name "$functionAppName-auth" --reply-urls "https://$functionAppName.azurewebsites.net/.auth/login/aad/callback" --query appId --out tsv)
az ad app update --id $appId --identifier-uris api://$appId;
$appCredentials=$(az ad app credential reset --id "$appId")
echo $appCredentials
Take note of the appId and password values in the output as we’ll be using these later.
Now let’s update our main.bicep file with the required configuration for Azure AD authentication. At the top of the file add two new parameters. One named authClientId and the other authClientSecret. authClientSecret should be marked as a secure parameter.
param authClientId string

@secure()
param authClientSecret string
Next up let’s add the authSettings configuration to the Function App site resource. This configuration should be nested within the functionApp resource definition.
resource authSettings 'config@2020-12-01' = {
  name: 'authsettingsV2'
  properties: {
    globalValidation: {
      requireAuthentication: true
      unauthenticatedClientAction: 'Return401'
      redirectToProvider: 'azureactivedirectory'
    }


    identityProviders: {
      azureActiveDirectory: {
        enabled: true
        registration: {
          openIdIssuer: 'https://sts.windows.net/${subscription().tenantId}'
          clientId: authClientId
          clientSecretSettingName: 'MICROSOFT_PROVIDER_AUTHENTICATION_SECRET'
        }
        validation: {
          allowedAudiences: [
            'api://${authClientId}'
          ]
        }
      }
    }
  }
}
Finally let’s add the authentication secret variable to the Function App config settings. The following should be added to the bottom of the appSettings resource, underneath WEBJOBS_IDLE_TIMEOUT.
MICROSOFT_PROVIDER_AUTHENTICATION_SECRET: authClientSecret
That’s it, we’ve finished the bicep configuration required for Azure AD authentication for our Function App. We can now deploy our main.bicep file again to apply this configuration. We’ll be prompted for authClientId and authClientSecret values, these are the appId and password values respectively that were noted down earlier.
az deployment group create --resource-group secure-rg --template-file main.bicep --query properties.outputs
Now let’s go ahead and test our API. First let’s test it without an authorization header. You’ll need to replace {functionAppName} with the name of your function app.
$functionAppName="{functionAppName}"
az rest -m get --header "Accept=application/json" -u "https://$functionAppName.azurewebsites.net/api/TopFiveProducts" --skip-authorization-header
This command should return a result with Unauthorized(You do not have permission to view this directory or page.)
Now let’s configure the AZ CLI to be an authorized client for our API. We can do this by configuring the AZ CLI (represented by its appId 04b07795-8ddb-461a-bbee-02f9e1bf7b46) as one of the preAuthorizedApplications of our app registration. Replace {appId} with the appId from when the app registration was created.
$appId="{appId}"
$objectId=$(az ad app show --id $appId --out tsv --query objectId)
$apiPermission=$(az ad app show --id $appId -o tsv --query oauth2Permissions[0].id)
az rest -m PATCH -u https://graph.microsoft.com/beta/applications/$objectId --headers Content-Type=application/json -b "{'api':{'preAuthorizedApplications':[{'appId':'04b07795-8ddb-461a-bbee-02f9e1bf7b46','permissionIds':['$apiPermission']}]}}"
Now we can test our API directly from AZ CLI. Replace {appId} with the appId from when the app registration was created and {functionAppName} with the name of your Function App.
**You may receive an error running the following command. If you do you need to reauthenticate with az cli by running az login.
$appId="{appId}"
$functionAppName="{functionAppName}"

az rest -m get --header "Accept=application/json" -u "https://$functionAppName.azurewebsites.net/api/TopFiveProducts" --resource "api://$appId"
You should be returned a JSON response with the top 5 products from the API.
Conclusion
In this blog post we looked at how you can configure Azure AD authentication for an Azure Function App. Join me in the next blog post of this series where we look at how you can configure managed identity for a Function App and grant access to other Azure resources.


